Hey, fellow web wizards! ✨ Ready to level up your front-end skills by building something from scratch? Whether you’re new to coding or just looking to create something quick and simple, this Front-End Projects tutorial will guide you through building a stunning yet simple web page with just HTML. 📄💻
Grab a cup of coffee ☕, put on your favorite tunes 🎧, and let’s have some fun building your very first eye-catching web page!
Table of Contents
Concepts We Will Learn In This Front-End Projects 1st Project
- HTML Document Structure
- DOCTYPE Declaration
- HTML
<head>and<body>tags - Meta Tags (Charset, Viewport)
- Page Title
- Header Section (
<header>tag) - Navigation Bar (
<nav>and<ul>tags) - Anchor Tags (
<a>for links) - Heading Tags (
<h1>,<h2>,<h3>) - Paragraph Tags (
<p>) - Sectioning Content (
<section>and<div>) - Footer Section (
<footer>tag) - HTML Entities (© Symbol)
Step 1: Setting Up the HTML Structure
Alright, let’s dive right in. Our first step is creating the HTML skeleton of our website. 🦴 Think of this as the framework that holds everything together!
At the top, you’ll see:
<!DOCTYPE html>
<html lang="en">
<head>
  <meta charset="UTF-8">
  <meta name="viewport" content="width=device-width, initial-scale=1.0">
  <title>Simple Web Page</title>
</head>
<body>
- The
<!DOCTYPE html>tag: This tells the browser we’re using HTML5, the latest and greatest! - The
<meta charset="UTF-8">: This helps your page handle all sorts of text and characters—so your users see those emojis and special symbols without a hitch! 💥 - The
<meta name="viewport" content="width=device-width, initial-scale=1.0">: This one’s a must for responsive design, ensuring your page looks fab on both big desktop screens and tiny mobile screens! 📱💻 - The
<title>tag: The text here will show up as the name of your tab in the browser—super handy for users navigating between pages.
Step 2: Creating the Header Section
Our header sets the tone for the site and contains a sleek navigation bar. It’s where visitors get their first impression—so make it count! 💪
<header>
  <h1>My Simple Website</h1>
  <nav>
    <ul>
      <li><a href="#">Home</a></li>
      <li><a href="#">About</a></li>
      <li><a href="#">Contact</a></li>
    </ul>
  </nav>
</header>
- The
<header>tag: This holds our page’s title and menu. - The
<nav>and<ul>combo: This is our navigation menu! It gives users quick links to sections like Home, About, and Contact.
Now your visitors can zip around your site with ease! 🚀
Step 3: Adding a Hero Section
This is where you welcome users in style! 🎉 A hero section is perfect for a big, bold message that grabs attention as soon as someone lands on your page.
<section class="hero">
  <h2>Welcome to My Simple Web Page</h2>
</section>
- The
<section>tag: This is our main “hero” section. - The
<h2>tag: Our attention-grabbing headline!
Feel free to spice up the welcome message with something that fits your vibe! 🙌
Step 4: Main Content Section
Time to give your users the meaty info they came for. The main content section introduces your visitors to what your website is all about.
<section class="main-content">
  <h2>About Us</h2>
  <p>Welcome to our simple webpage. We offer amazing features and services to make your online experience better.</p>
The <section class="main-content">: This is the main section, where we add important info.
The <p> tag: This lets you write out beautiful blocks of text that explain who you are, what you do, and why you’re awesome! 😎
Step 5: Highlighting Features
Show off your cool features here! 🎨✨ Each one gets its own box with a title and description, neatly organized.
<div class="features">
  <div class="feature">
    <h3>Feature 1</h3>
    <p>Amazing feature description.</p>
  </div>
  <div class="feature">
    <h3>Feature 2</h3>
    <p>Incredible feature description.</p>
  </div>
  <div class="feature">
    <h3>Feature 3</h3>
    <p>Outstanding feature description.</p>
  </div>
</div>
- The
<div class="features">: A simple container to wrap all your features. - Each
<h3>and<p>pair: For every amazing, incredible, and outstanding thing you want to showcase.
Step 6: Call to Action (CTA)
Let’s not forget the Call to Action! 🛎️ This button encourages users to dive deeper into your website or offerings.
<div class="cta">
  <a href="#">Learn More</a>
</div>
- The
<a>tag: This button is clickable, taking users to the next big thing you want them to see. Keep it short and punchy!
Step 7: Footer Section
Finally, we wrap it all up with a footer. It’s a great place for contact info, social links, and copyright details. 🌐
<footer>
<p>© 2024 My Simple Website. All Rights Reserved.</p>
<div class="socials">
<a href="#">Facebook</a>
<a href="#">Twitter</a>
<a href="#">Instagram</a>
</div>
</footer>
- The
<footer>tag: This section keeps things organized at the very bottom.
- The social links (
<a>): Add your social media accounts to keep users engaged even after they leave your site. 🎉
Wrapping Up
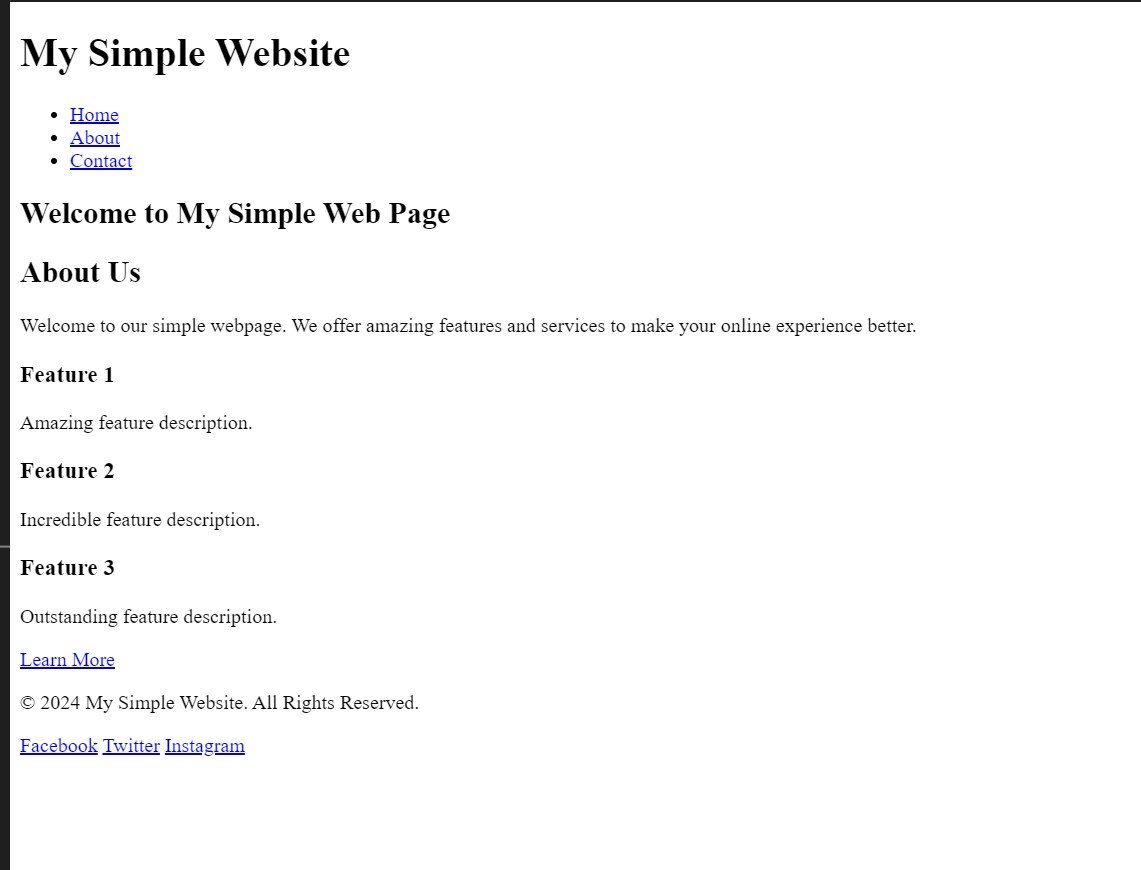
Congrats, you’ve just built your first simple yet eye-catching web page! 🎉 You now know how to structure an HTML document, create a header, add a hero section, showcase features, and end it all with a sleek footer.
This project is just the beginning! 🚀 Keep following along in the Front-End Projects Series, and you’ll build even more exciting and advanced projects in no time. 💡
In our next project, we will use CSS to design this page.
Need more help or have questions? Drop a comment below and let’s code together! If you enjoyed this tutorial, don’t forget to hit that like button, share it with your friends, and subscribe for more fun web development projects.
Stay tuned for more awesome tutorials! ✌️😊
Video Tutorial:
Source Code:
<!DOCTYPE html>
<html lang="en">
<head>
<meta charset="UTF-8">
<meta name="viewport" content="width=device-width, initial-scale=1.0">
<title>Simple Web Page</title>
</head>
<body>
<!-- Header Section -->
<header>
<h1>My Simple Website</h1>
<nav>
<ul>
<li><a href="#">Home</a></li>
<li><a href="#">About</a></li>
<li><a href="#">Contact</a></li>
</ul>
</nav>
</header>
<!-- Hero Section -->
<section class="hero">
<h2>Welcome to My Simple Web Page</h2>
</section>
<!-- Main Content -->
<section class="main-content">
<h2>About Us</h2>
<p>Welcome to our simple webpage. We offer amazing features and services to make your online experience better.</p>
<!-- Features Section -->
<div class="features">
<div class="feature">
<h3>Feature 1</h3>
<p>Amazing feature description.</p>
</div>
<div class="feature">
<h3>Feature 2</h3>
<p>Incredible feature description.</p>
</div>
<div class="feature">
<h3>Feature 3</h3>
<p>Outstanding feature description.</p>
</div>
</div>
<!-- Call to Action -->
<div class="cta">
<a href="#">Learn More</a>
</div>
</section>
<!-- Footer Section -->
<footer>
<p>© 2024 My Simple Website. All Rights Reserved.</p>
<div class="socials">
<a href="#">Facebook</a>
<a href="#">Twitter</a>
<a href="#">Instagram</a>
</div>
</footer>
</body>
</html>
Output:
Want more of these types of Projects? Continue visiting our website. We will be uploading hundreds of Front-End Projects and much more.