Impact-Site-Verification: adb347d4-a12b-4ba7-93c7-2e3fa71724bf
This tutorial will walk you through the process of creating a fully functional pro-level drawing application, using the HTML Canvas API. By the end of this tutorial, you’ll have an app that lets users draw freehand with a variety of brush sizes and colors, shapes like rectangles and circles, undo mistakes, clear the canvas, and save their artwork as an image. We’ll also make sure it’s responsive and user-friendly!
How to Build a Canvas Drawing App: Step-by-Step Integration
Table of Contents
1. Set up the project
We will first lay down the fundamental structure of our drawing application, which includes some HTML to get us started, and add the <canvas> element where all magic will happen.
HTML:
<!DOCTYPE html>
<html lang="en">
<head>
    <meta charset="UTF-8">
    <meta name="viewport" content="width=device-width, initial-scale=1.0">
    <title>Canvas Drawing App</title>
</head>
<body>
    <h1>Canvas Drawing App</h1>
    <div class="toolbar">
        <button id="clearBtn">Clear</button>
        <button id="undoBtn">Undo</button>
        <button id="saveBtn">Save</button>
        <fieldset style="background-color: #ccc; border-radius: 10px; margin: 5px;">
            <label for="colorPicker" >Brush Color:</label>
        <input type="color" id="colorPicker" value="#000000">
        </fieldset>
        <fieldset style="background-color: #ccc; border-radius: 10px; margin: 5px;">
            <label for="bgColorPicker">Background Color:</label>
            <input type="color" id="bgColorPicker" value="#ffffff">
        </fieldset>
        <fieldset style="background-color: #ccc; border-radius: 10px; margin: 5px;">
            <label for="brushSize">Brush Size:</label>
            <input type="range" id="brushSize" min="1" max="50" value="5">
        </fieldset>
        <fieldset style="background-color: #ccc; border-radius: 10px; margin: 5px;">
            <label for="drawingMode">Drawing Mode:</label>
            <select id="drawingMode">
                <option value="freehand">Free hand</option>
                <option value="line">Line</option>
                <option value="rect">Rectangle</option>
                <option value="circle">Circle</option>
            </select>
        </fieldset>
    </div>
    <canvas id="canvas" width="1000" height="500"></canvas>
</body>
</html>

Here, we have the toolbar with buttons and inputs for color, background, and brush size, along with the canvas where drawing happens and some drawing modes also.
2. Styling the Canvas Drawing App
Next, let’s style the app to make it visually appealing.
   body {
        text-align: center;
        font-family: Arial, sans-serif;
        background-color: #f4f4f9;
        margin: 0;
        padding: 20px;
    }

    h1 {
        margin-bottom: 20px;
        color: #333;
    }

    .toolbar {
        display: flex;
        justify-content: center;
        align-items: center;
        margin-bottom: 20px;
        background-color: #fff;
        padding: 10px;
        border-radius: 8px;
        box-shadow: 0 4px 8px rgba(0, 0, 0, 0.1);
    }

    button {
        background-color: #007bff;
        color: #fff;
        border: none;
        padding: 10px 15px;
        margin: 0 10px;
        border-radius: 5px;
        cursor: pointer;
        font-size: 16px;
        transition: background-color 0.3s;
    }

    button:hover {
        background-color: #0056b3;
    }

    input[type="color"], input[type="range"] {
        margin: 0 10px;
        border-radius: 5px;
        border: 1px solid #ccc;
    }

    input[type="range"] {
        width: 150px;
    }

 /* Label Styles */
    label {
        margin-right: 10px;
        font-size: 16px;
        color: #333;
    }

        /* Dropdown Styles */
    select {
        padding: 10px;
        font-size: 16px;
        border-radius: 5px;
        border: 1px solid #ccc;
        cursor: pointer;
    }

    canvas {
        border-radius: 20px;
        display: block;
        margin: 0 auto;
        border: 2px solid #333;
        box-shadow: 0 4px 10px rgba(0, 0, 0, 0.1);
        cursor: crosshair;
    }

/* For devices with max-width 768px (tablets and smaller) */
    @media (max-width: 768px) {
        .toolbar {
            flex-direction: column;
            padding: 10px;
        }

    button, input[type="color"], input[type="range"] {
            margin-bottom: 10px;
            width: 100%;
        }

    input[type="range"] {
            width: 100%;
        }


    }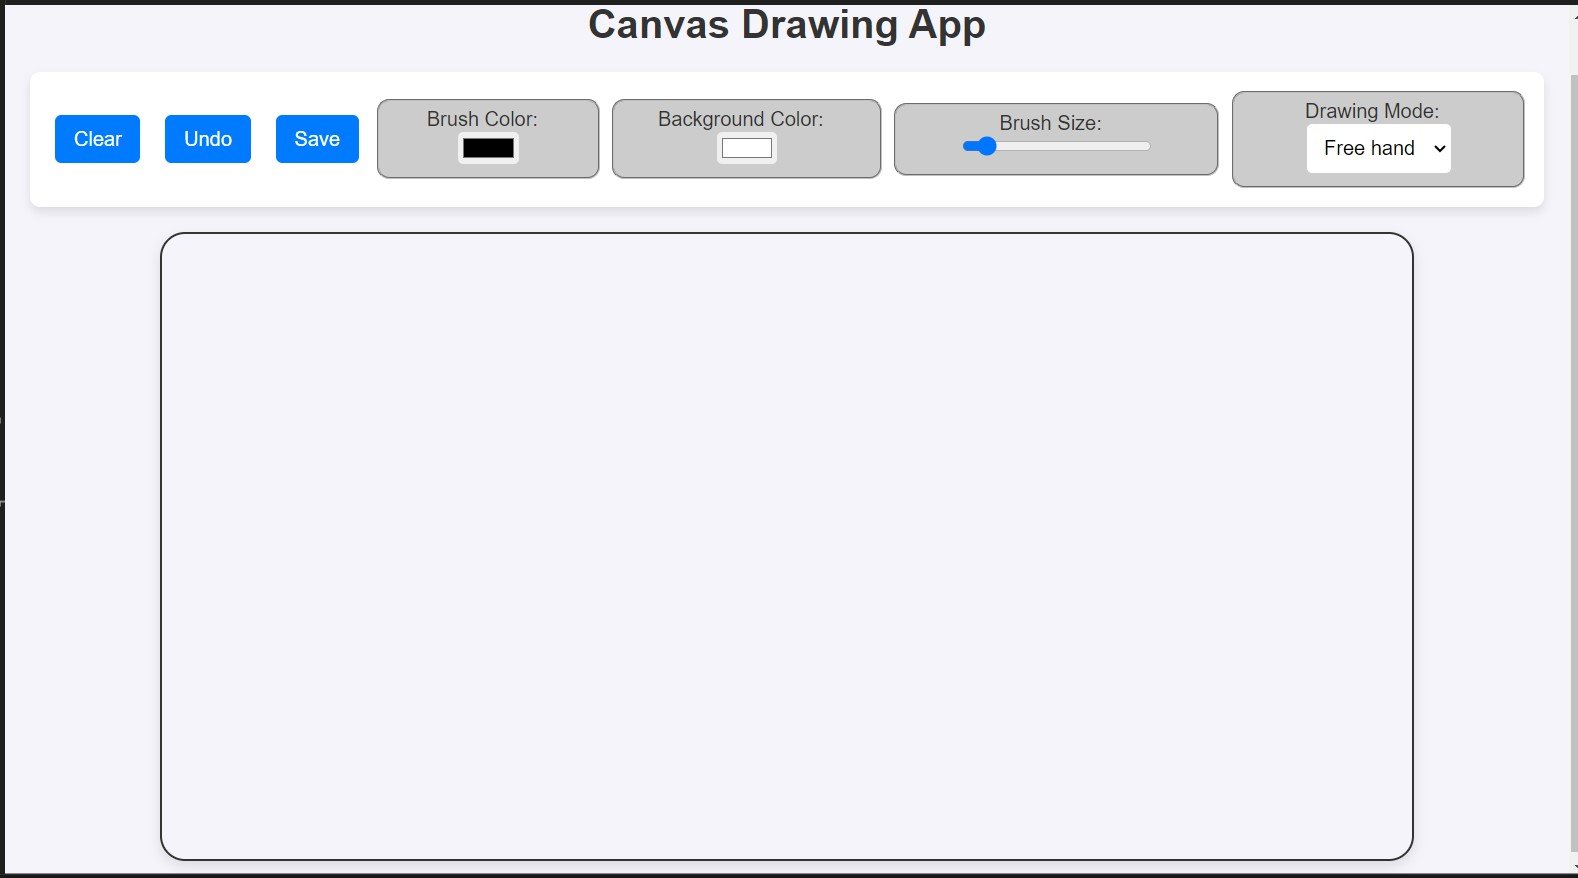
This CSS adds a neat border to the canvas, centers it, and gives it a slight shadow to make it stand out. It also makes sure the app looks clean and modern.
3. Understanding the HTML5 Canvas API
Before diving into the JavaScript code, it’s crucial to understand the basics of the Canvas API. The canvas tag in HTML represents a drawable region, and we can use JavaScript to control this region. The canvas can be used to draw shapes, lines, images, and more by accessing its context (using getContext('2d') for 2D drawing).
4. Initializing the Canvas with JavaScript
Let’s start by initializing the canvas and setting up its drawing context.
const canvas = document.getElementById('canvas');
const ctx = canvas.getContext('2d');

// Set default brush size and color
let brushColor = '#000000';
let brushSize = 5;
let painting = false;
This code grabs the canvas element from the HTML and sets the context for 2D drawing. We’ve also initialized variables for the brush color and size.
5. Handling Mouse Events for Drawing
For drawing, we need to capture mouse events like mousedown, mouseup, and mousemove.
canvas.addEventListener('mousedown', (e) => {
    painting = true;
    ctx.beginPath();
    ctx.moveTo(e.offsetX, e.offsetY);
});

canvas.addEventListener('mouseup', () => {
    painting = false;
});

canvas.addEventListener('mousemove', (e) => {
    if (painting) {
        ctx.lineTo(e.offsetX, e.offsetY);
        ctx.strokeStyle = brushColor;
        ctx.lineWidth = brushSize;
        ctx.stroke();
    }
});
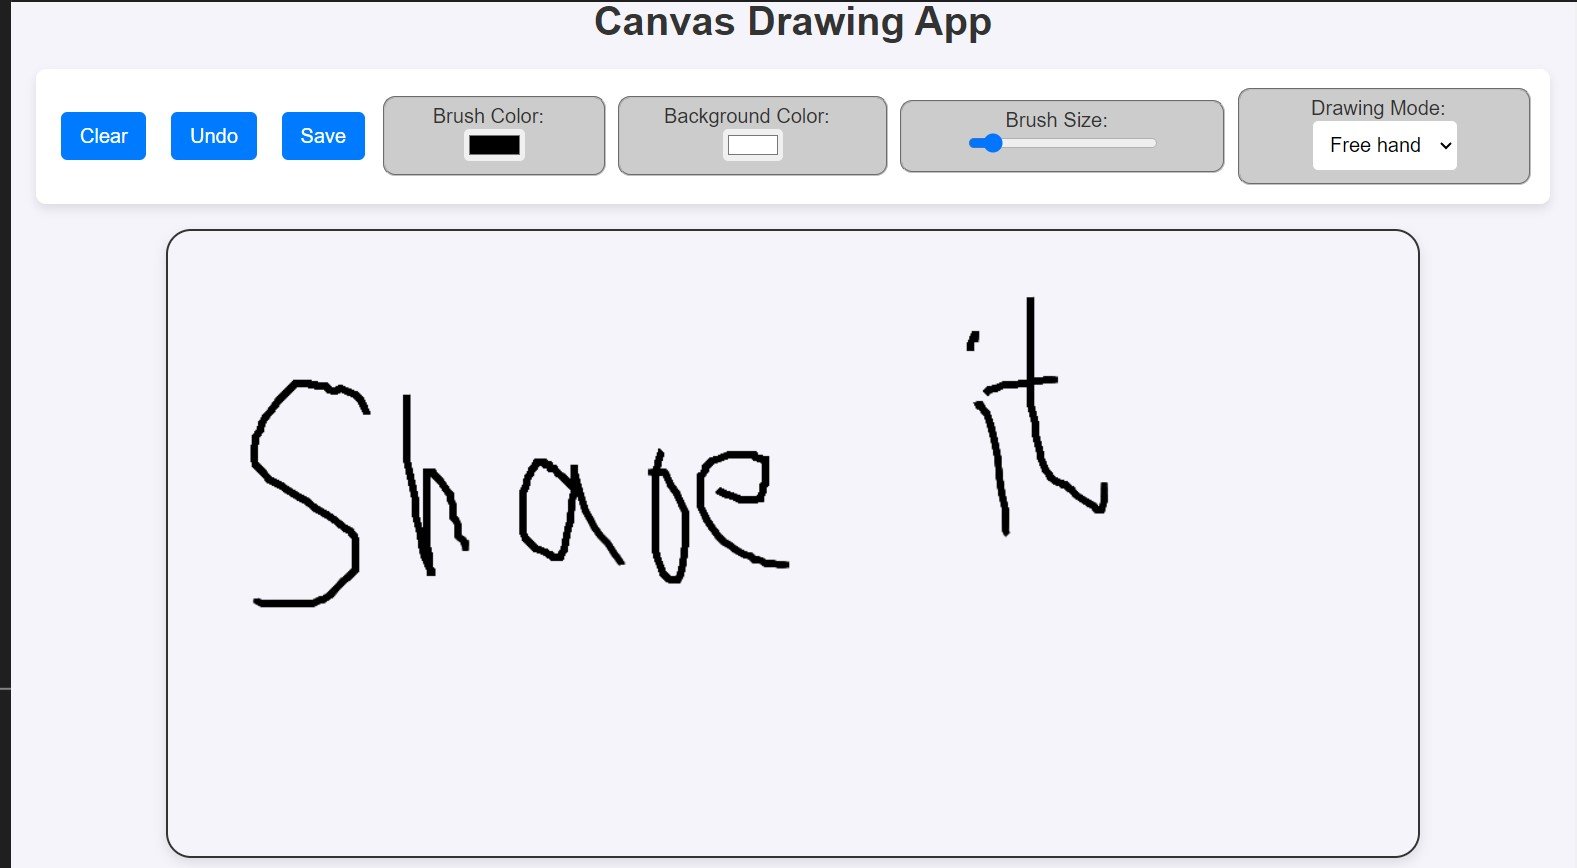
This code ensures that drawing begins when the mouse is pressed down (mousedown), continues while the mouse moves (mousemove), and stops when the mouse is released (mouseup).
6. Drawing Freehand
The freehand drawing is now functional. Users can click and drag to draw on the canvas. To make it more interesting, we’ll also add controls to adjust the brush size and color.
<div class="toolbar">
    <label for="colorPicker">Brush Color:</label>
    <input type="color" id="colorPicker" value="#000000">

    <label for="brushSize">Brush Size:</label>
    <input type="range" id="brushSize" min="1" max="50" value="5">
</div>
Actually, we have already added this in our HTML at the first step, so you don’t need to do it again.
7. Implementing the Undo Feature
Allowing users to undo their last drawing action is crucial. We can achieve this by saving the canvas state after each drawing action and restoring it when needed.
let drawnShapes = [];

function saveCanvasState() {
    const canvasData = ctx.getImageData(0, 0, canvas.width, canvas.height);
    drawnShapes.push(canvasData);
}

function undoLastAction() {
    if (drawnShapes.length > 0) {
        drawnShapes.pop(); // Remove last shape
        const lastState = drawnShapes[drawnShapes.length - 1];
        if (lastState) {
            ctx.putImageData(lastState, 0, 0);
        }
    }
}
8. Clearing the Canvas
The “Clear” button allows users to erase all drawings on the canvas.
document.getElementById('clearBtn').addEventListener('click', () => {
    ctx.clearRect(0, 0, canvas.width, canvas.height);
});
9. Saving the Drawing as an Image
Users may want to save their creations, so let’s implement a “Save” button that downloads the drawing as a PNG file.
document.getElementById('saveBtn').addEventListener('click', () => {
    const link = document.createElement('a');
    link.download = 'canvas-drawing.png';
    link.href = canvas.toDataURL();
    link.click();
});
Also Read:
- Learn HTML5 Canvas API In 30 Minutes: The Ultimate Guide
- The Ultimate HTML Cheat Sheet: Code Like a Pro!
- JavaScript Type Conversion: The Ultimate Guide To Data Types
- Building a drawing application with HTML5 Canvas
- Why JavaScript is the Backbone of the Web (And Why You Should Care)
Who Uses Canvas Drawing Apps?
Canvas drawing apps are being utilized by both professionals and simple individuals, including:
- Graphic Designers – They use canvas apps to sketch, create prototypes, or develop designs.
- Web Developers – Also developers can make interactive drawings or animations on their site with the help of HTML5 Canvas API.
- Artists – Digital artists can use drawing apps for sketching and creating artwork, especially if the app has different brush types and styles.
- Teachers and Educators – Teachers use such apps to create diagrams, illustrate concepts, or provide interactive lessons.
- Students – Students can use these apps for learning, making diagrams, or making notations more visually appealing.
- Gamers and Game Developers – Canvas apps are often used in developing 2D games, where drawing objects or rendering characters on the screen is necessary.
Why Use Canvas Drawing Apps?
Canvas drawing apps provide a versatile platform for both professionals and casual users to create digital drawings. Some of the reasons people use these apps include:
- Ease of Use – Most of the Canvas Drawing Applications do not require installation of additional software because they are browser-based and easy to access.
- Creative Freedom – It allows its users to draw freely, and experiment with various shapes, colours, and effects. It gives greater scope for creativity.
- Learning Purpose – Ideal for students and beginners learning how to code or draw, providing a platform to practice.
- Customization – These apps can be customized easily, according to the requirements of the user. They may have brush size customization and color options and undo/redo functionality.
- Cross-Platform – As it is a browser-based application, it will be compatible with any device used including PCs, mobiles, or tablets.
Pros of Canvas Drawing Apps
- Cross-Browser Compatibility
Canvas apps work seamlessly across different browsers, which makes them highly accessible. - No Installation Needed
Since they run inside the browser, users save time and resources, as no additional software application needs to be installed before use. - Interactive Features
Developers can add interactive elements, such as undo, save, brush size customization, and shape drawing tools, enhancing user experience. - Customizability
Developers can have full control over the drawing environment that can be tuned as per user or project-specific requirements. - Responsive Design
With proper coding, canvas apps can be responsive and work well on various devices, including tablets and smartphones.
Cons of Canvas Drawing Apps
- Performance Issues with Complex Drawings
As the complexity of the drawing increases, performance may degrade, especially on lower-end devices. - Limited Drawing Tools Compared to Professional Software
While Canvas apps are versatile, they cannot compare with features that are found in professional drawing software such as Adobe Illustrator, or Photoshop which can provide more sophisticated tools and effects. - Requires JavaScript Knowledge for Customization
For developers who want to customize or create complex drawing apps, a deep understanding of JavaScript and the Canvas API is essential, which might be a steep learning curve for beginners. - Browser Dependency
Since Canvas drawing apps run in browsers, users are limited by the capabilities of the browser and its support for specific features of the HTML5 Canvas API. - No Native Undo/Redo
Unlike professional drawing tools, Canvas doesn’t come with built-in undo/redo functionality, which developers need to implement manually.
Final Thoughts
Canvas drawing apps are excellent tools for graphic designers, web developers, students, and casual users alike. They offer easy access, creative flexibility, and platform independence, making them highly versatile. However, they do come with certain limitations, particularly regarding advanced drawing features and performance in complex projects.
Conclusion
With this guide, you’ve built a fully functional Canvas Drawing App with:
- Basic drawing features
- Undo and Clear functionalities
- Customization options for stroke color, bacground, and brush size
- Ability to save the drawing as an image
- Responsive design
Complete Code:
Here’s the full code in one HTML file:
<!DOCTYPE html>
<html lang="en">
<head>
    <meta charset="UTF-8">
    <meta name="viewport" content="width=device-width, initial-scale=1.0">
    <title>Canvas Drawing App</title>
    <style>
      body {
        text-align: center;
        font-family: Arial, sans-serif;
        background-color: #f4f4f9;
        margin: 0;
        padding: 20px;
    }

    h1 {
        margin-bottom: 20px;
        color: #333;
    }

    .toolbar {
        display: flex;
        justify-content: center;
        align-items: center;
        margin-bottom: 20px;
        background-color: #fff;
        padding: 10px;
        border-radius: 8px;
        box-shadow: 0 4px 8px rgba(0, 0, 0, 0.1);
    }

    button {
        background-color: #007bff;
        color: #fff;
        border: none;
        padding: 10px 15px;
        margin: 0 10px;
        border-radius: 5px;
        cursor: pointer;
        font-size: 16px;
        transition: background-color 0.3s;
    }

    button:hover {
        background-color: #0056b3;
    }

    input[type="color"], input[type="range"] {
        margin: 0 10px;
        border-radius: 5px;
        border: 1px solid #ccc;
    }

    input[type="range"] {
        width: 150px;
    }

 /* Label Styles */
    label {
        margin-right: 10px;
        font-size: 16px;
        color: #333;
    }

        /* Dropdown Styles */
    select {
        padding: 10px;
        font-size: 16px;
        border-radius: 5px;
        border: 1px solid #ccc;
        cursor: pointer;
    }

    canvas {
        border-radius: 20px;
        display: block;
        margin: 0 auto;
        border: 2px solid #333;
        box-shadow: 0 4px 10px rgba(0, 0, 0, 0.1);
        cursor: crosshair;
    }

/* For devices with max-width 768px (tablets and smaller) */
    @media (max-width: 768px) {
        .toolbar {
            flex-direction: column;
            padding: 10px;
        }

    button, input[type="color"], input[type="range"] {
            margin-bottom: 10px;
            width: 100%;
        }

    input[type="range"] {
            width: 100%;
        }


    }

/* For devices with max-width 480px (mobile phones) */
@media (max-width: 480px) {
    h1 {
        font-size: 18px;
    }

    button {
        font-size: 14px;
        padding: 8px 10px;
    }

    .toolbar {
        padding: 8px;
    }

    input[type="range"] {
        width: 100%;
    }


}
    </style>
</head>
<body>
    <h1>Canvas Drawing App</h1>
    <div class="toolbar">
        <button id="clearBtn">Clear</button>
        <button id="undoBtn">Undo</button>
        <button id="saveBtn">Save</button>
        <fieldset style="background-color: #ccc; border-radius: 10px; margin: 5px;">
            <label for="colorPicker" >Brush Color:</label>
        <input type="color" id="colorPicker" value="#000000">
        </fieldset>
        <fieldset style="background-color: #ccc; border-radius: 10px; margin: 5px;">
            <label for="bgColorPicker">Background Color:</label>
            <input type="color" id="bgColorPicker" value="#ffffff">
        </fieldset>
        <fieldset style="background-color: #ccc; border-radius: 10px; margin: 5px;">
            <label for="brushSize">Brush Size:</label>
            <input type="range" id="brushSize" min="1" max="50" value="5">
        </fieldset>
        <fieldset style="background-color: #ccc; border-radius: 10px; margin: 5px;">
            <label for="drawingMode">Drawing Mode:</label>
            <select id="drawingMode">
                <option value="freehand">Free hand</option>
                <option value="line">Line</option>
                <option value="rect">Rectangle</option>
                <option value="circle">Circle</option>
            </select>
        </fieldset>
    </div>
    <canvas id="canvas" width="1000" height="500"></canvas>
     <script>
    window.onload = function () {
    const canvas = document.getElementById('canvas');
    const ctx = canvas.getContext('2d');

    // Initial state
    let painting = false;
    let brushColor = '#000000';
    let bgColor = '#ffffff';
    let brushSize = 5;
    let drawingMode = 'freehand';
    let startX = 0;
    let startY = 0;
    let currentX = 0;
    let currentY = 0;
    let drawnShapes = [];

    // Set initial background color
    ctx.fillStyle = bgColor;
    ctx.fillRect(0, 0, canvas.width, canvas.height);

    // Mouse down event to start drawing
    canvas.addEventListener('mousedown', (e) => {
        painting = true;
        startX = e.offsetX;
        startY = e.offsetY;
        if (drawingMode === 'freehand') {
            ctx.beginPath();
            ctx.moveTo(startX, startY);
            ctx.lineCap = 'round';
        }
    });

    // Mouse up event to end drawing
    canvas.addEventListener('mouseup', (e) => {
        if (!painting) return;
        painting = false;

        if (drawingMode === 'line') {
            drawLine(e.offsetX, e.offsetY, true);
        } else if (drawingMode === 'rect') {
            drawRectangle(e.offsetX, e.offsetY, true);
        } else if (drawingMode === 'circle') {
            drawCircle(e.offsetX, e.offsetY, true);
        }

        // Save the state for undo
        const canvasData = ctx.getImageData(0, 0, canvas.width, canvas.height);
        drawnShapes.push(canvasData);
    });

    // Mouse move event to draw or update shapes
    canvas.addEventListener('mousemove', (e) => {
        if (!painting) return;

        currentX = e.offsetX;
        currentY = e.offsetY;

        // Clear the canvas and redraw previous shapes
        ctx.clearRect(0, 0, canvas.width, canvas.height);
        ctx.fillStyle = bgColor;
        ctx.fillRect(0, 0, canvas.width, canvas.height);

        if (drawnShapes.length > 0) {
            ctx.putImageData(drawnShapes[drawnShapes.length - 1], 0, 0);
        }

        if (drawingMode === 'freehand') {
            drawFreehand(currentX, currentY);
        } else if (drawingMode === 'line') {
            drawLine(currentX, currentY, false);
        } else if (drawingMode === 'rect') {
            drawRectangle(currentX, currentY, false);
        } else if (drawingMode === 'circle') {
            drawCircle(currentX, currentY, false);
        }
    });

    // Draw freehand
    function drawFreehand(x, y) {
        ctx.lineWidth = brushSize;
        ctx.strokeStyle = brushColor;
        ctx.lineTo(x, y);
        ctx.stroke();
    }

    // Draw Line
    function drawLine(x, y, isFinal) {
        ctx.lineWidth = brushSize;
        ctx.strokeStyle = brushColor;
        ctx.beginPath();
        ctx.moveTo(startX, startY);
        ctx.lineTo(x, y);
        ctx.stroke();
        if (isFinal) {
            ctx.closePath();
        }
    }

    // Draw Rectangle
    function drawRectangle(x, y, isFinal) {
        ctx.lineWidth = brushSize;
        ctx.strokeStyle = brushColor;
        const width = x - startX;
        const height = y - startY;
        ctx.strokeRect(startX, startY, width, height);
        if (isFinal) {
            ctx.closePath();
        }
    }

    // Draw Circle
    function drawCircle(x, y, isFinal) {
        ctx.lineWidth = brushSize;
        ctx.strokeStyle = brushColor;
        const radius = Math.sqrt(Math.pow(x - startX, 2) + Math.pow(y - startY, 2));
        ctx.beginPath();
        ctx.arc(startX, startY, radius, 0, Math.PI * 2);
        ctx.stroke();
        if (isFinal) {
            ctx.closePath();
        }
    }

    // Toolbar button actions
    document.getElementById('clearBtn').addEventListener('click', () => {
        ctx.clearRect(0, 0, canvas.width, canvas.height);
        drawnShapes = []; // Clear history
        ctx.fillStyle = bgColor;
        ctx.fillRect(0, 0, canvas.width, canvas.height);
    });

    document.getElementById('undoBtn').addEventListener('click', () => {
        if (drawnShapes.length > 0) {
            drawnShapes.pop(); // Remove the last shape
            ctx.clearRect(0, 0, canvas.width, canvas.height); // Clear canvas
            ctx.fillStyle = bgColor;
            ctx.fillRect(0, 0, canvas.width, canvas.height);
            const lastImage = drawnShapes[drawnShapes.length - 1];
            if (lastImage) {
                ctx.putImageData(lastImage, 0, 0); // Restore the last state
            }
        }
    });

    document.getElementById('saveBtn').addEventListener('click', () => {
        const link = document.createElement('a');
        link.download = 'canvas-drawing.png';
        link.href = canvas.toDataURL();
        link.click();
    });

    // Event listeners for inputs
    document.getElementById('colorPicker').addEventListener('input', (e) => {
        brushColor = e.target.value; // Change the brush color dynamically
    });

    document.getElementById('bgColorPicker').addEventListener('input', (e) => {
        bgColor = e.target.value; // Update the background color in real-time
        ctx.fillStyle = bgColor;
        ctx.fillRect(0, 0, canvas.width, canvas.height);

        // Restore the drawn shapes
        if (drawnShapes.length > 0) {
            ctx.putImageData(drawnShapes[drawnShapes.length - 1], 0, 0);
        }
    });

    document.getElementById('brushSize').addEventListener('input', (e) => {
        brushSize = e.target.value;
    });

    document.getElementById('drawingMode').addEventListener('change', (e) => {
        drawingMode = e.target.value; // Change the drawing mode dynamically
    });
};

    </script>


</body>
</html>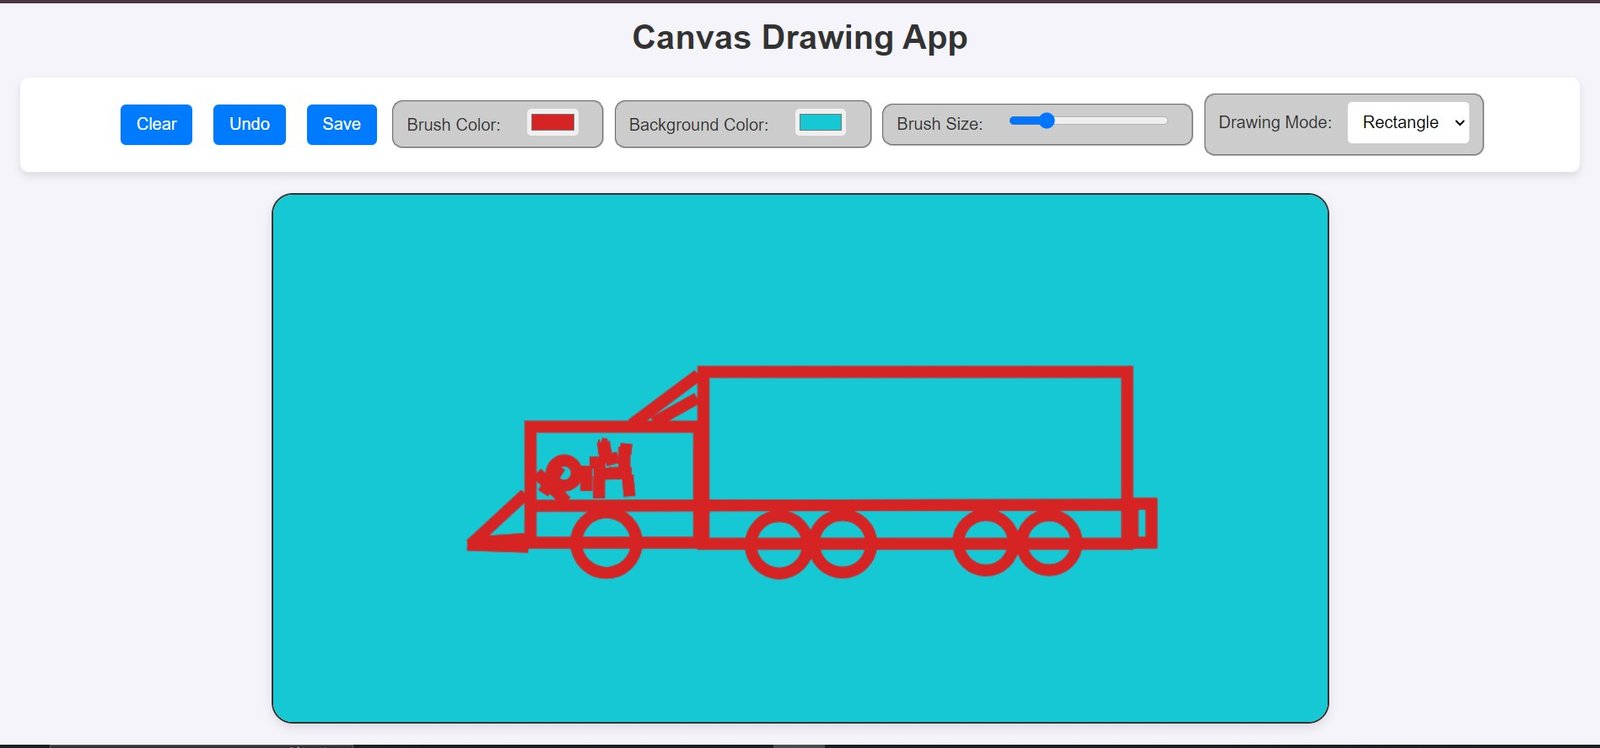
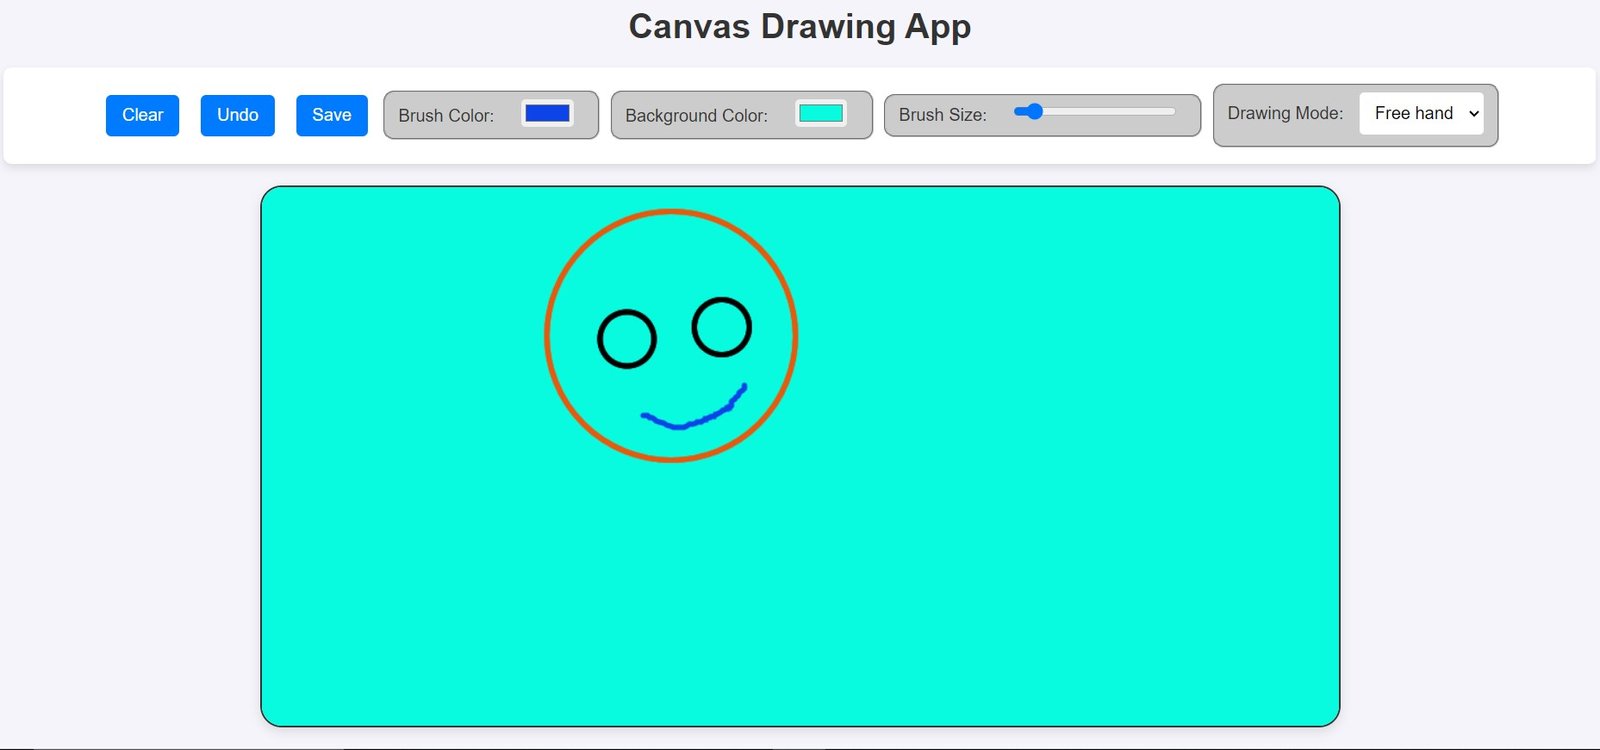
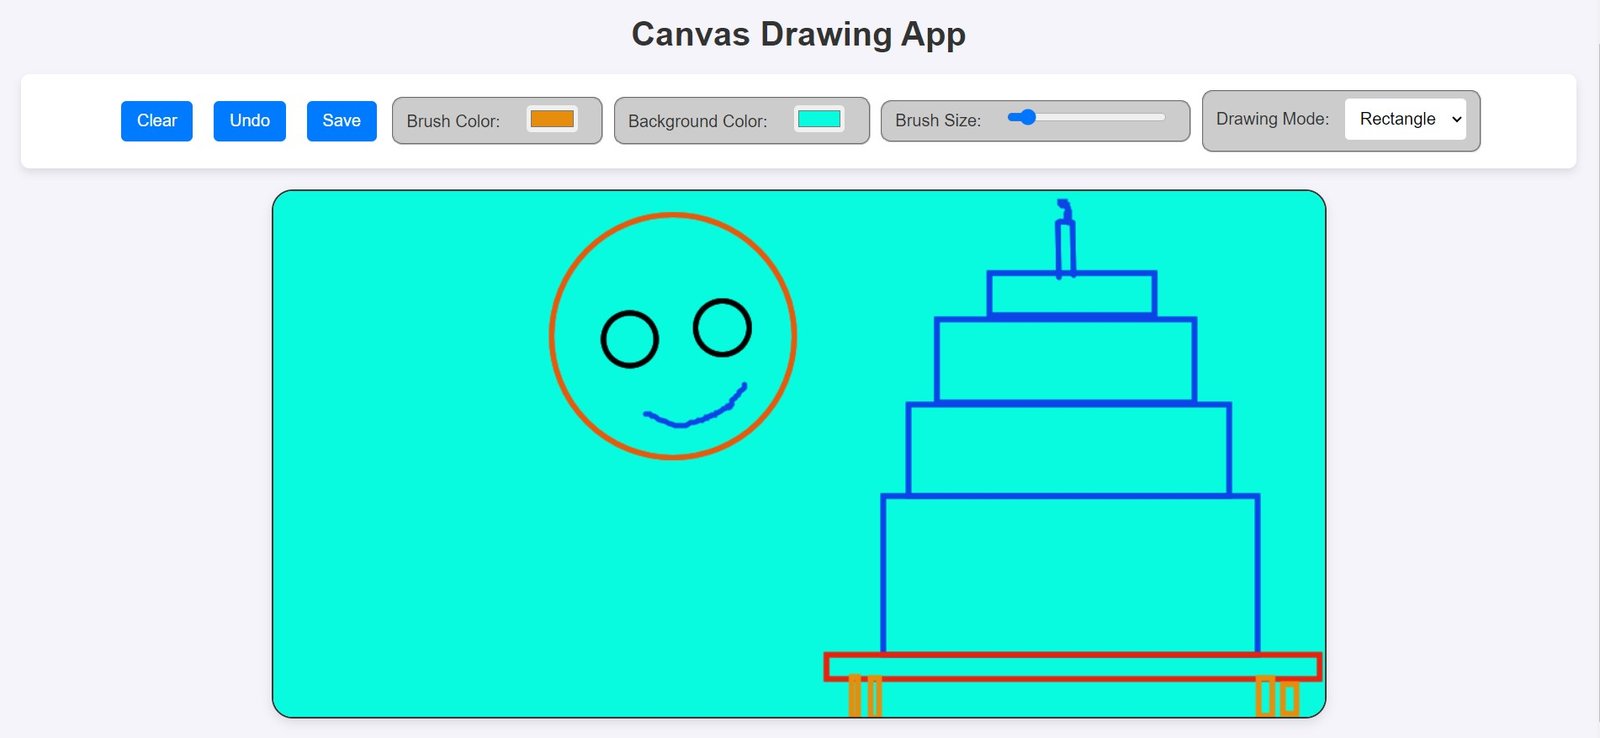
So basically it becomes easy to draw. You just need a little imagination. Let me share with you some more of my designs.
FAQs
Can I use this app on mobile devices?
Yes, you can enhance the app to capture touch events for mobile compatibility.
How do I add more shapes?
You can expand the drawing modes by adding functions to draw polygons, ellipses, and other shapes.
Is the canvas drawing app fast enough for large drawings?
The performance depends on the complexity of the drawing. You can optimize it by limiting the canvas size or brush strokes.
How can I make the app work offline?
You can use a service worker to cache the app resources and make it available offline.
Can I save my drawings in different formats?
Yes, with minor tweaks, you can allow users to export drawings in various formats like JPG or SVG.

